Why and how should your business build a 3D/2D visual media asset library?
Digital Asset Management (DAM) is a process that can help you to convert visual content into re-usable evergreen visual assets your business can use in advertisments and on social media.

Digitising your visual media gives you full, permanent ownership of your marketing materials.
Most small businesses that have worked with freelancers or agencies have probably never heard of Digital Asset Management (DAM), or given any consideration to building a digital asset library of their branded visual content. This is a big mistake, and it’s a common cause of muddled marketing priorities and the waste of huge sums of money re-commissioning work that has already been carried out previously.
Imagine that your business has your new product out of the prototype stage and ready to join a range of similar products that you produce. You are most likely going to want to have a consistent brand strategy across the range, including similar visual material. If relying on photography, this likely means scheduling a photo-shoot for the new product and possibly repeating parts of previous shoots to get a grouped photograph of the product. This could easily cost hundreds or thousands of pounds, depending on the nature of the product.
What if, instead, your business had simply commissioned isolated shots of the product and archived them in a re-usable format with transparent backgrounds? What if you had asked the photographer to take some empty studio shots of the shooting location before taking the product photos?
With this approach some limited photo manipulation would yield better and more consistent results without having to repeat any old work again. With high quality textured 3D models of the products, a photo-shoot could be further enhanced or even skipped altogether in favour of constructing a reusable 3D studio. It becomes clear that storing visual media and planning ahead when creating it is vitally important to the efficient operating of any business’ social media, advertising and marketing departments.
So how do we “assetise” visual media and practice Digital Asset Management? In the simplest format, it just means saving files in coherent file structures and backing data up on cloud services and/or portable hard drives. Files such as videos (.mp4s, .movs etc.), 2D images (.jpg, .png, .tiff, etc.) can be easily preserved in this manner; it is worth noting that images should be saved as .png files if you intend to edit and re-save them in the future, as this format is lossless and does not degrade upon editing. By contrast, .jpg images are more space efficient for your library but will degrade in quality over time if they are saved repeatedly.
What about 3D media pertaining to your brand or products? Here, the answer is broader and more complex. If you have an in-house 3D department (typically the domain of large companies such as IKEA), you should be cataloguing all 3D scene and model files in the “native” format of the program your team uses. For example, if you use 3DSMax to edit in 3D, you should have all your important files saved in .3ds file format. It is important to check that textures for your models are packed in the files for efficient storage.
Alternatively, if you commission your 3D models or other design content from an agency or freelancer, ask what their native format(s) are. For example, a 3D professional working in Blender will use files in the .blend format. If you work with this person regularly, you should ask for the fully packed .blend files to add to your archive.
It is especially important to ask for the project files when working with agencies, as it can be very expensive to pay a large agency to repeat the work again in future if they have not previously passed on the files for you to keep. Having all the project files will enable you to re-use the files with the same professional or another freelancer in the future, should your original contractor be unavailable. You can also open and edit the files yourself in future, should you want to.
MM3D primarily uses Blender software. As such, here is a short visual guide for making sure your .blend files are fully ready for archiving in your digital asset library. If you follow these simple steps you will produce a .blend file which can be used as an asset file, allowing you to not only preserve your branded content, but also instantly drag models and materials that you’ve created into future 3D scenes with the click of a button.

Start by selecting all of the objects you wish to save as Assets in the View Layer display on the right of the screen

On the top left, go to File —> Clean Up —> Purge Unused Data. This will remove all the unused assets in the file, saving you space.

Go to File —> External Data —> Pack Resources. This crucial step will save all texture information and other data into the file itself.
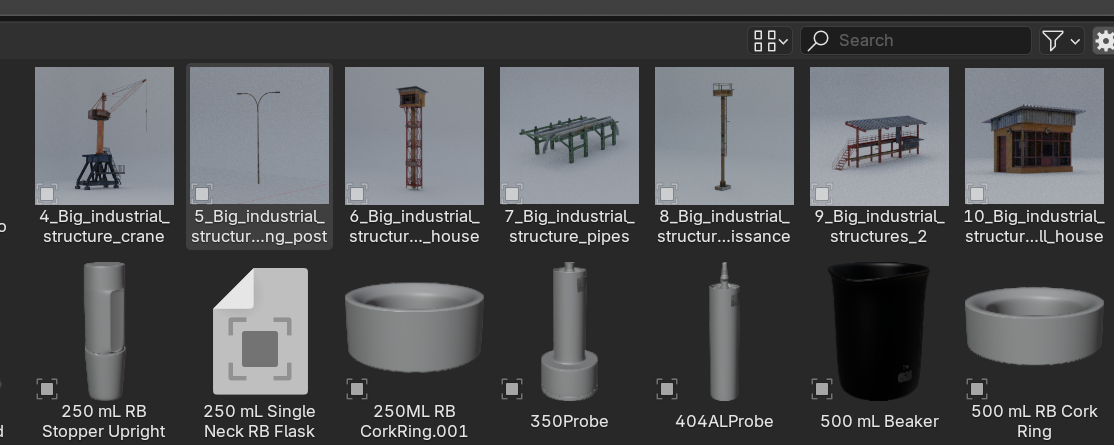
Every model and texture you have followed this process is now instantly usable with Blender’s Asset Library.
Creating and properly managing an asset library gives you permanent control over your branding. Your company now has ownership of everything produced in-house or by contractors, not just in the form of the end visual product, but all of the content produced during the work. Now that you know how to start building your 2D and 3D asset libraries, you might also find it helpful to check out our blog post on the benefits and drawbacks of 3D and photography for product imagery.
-